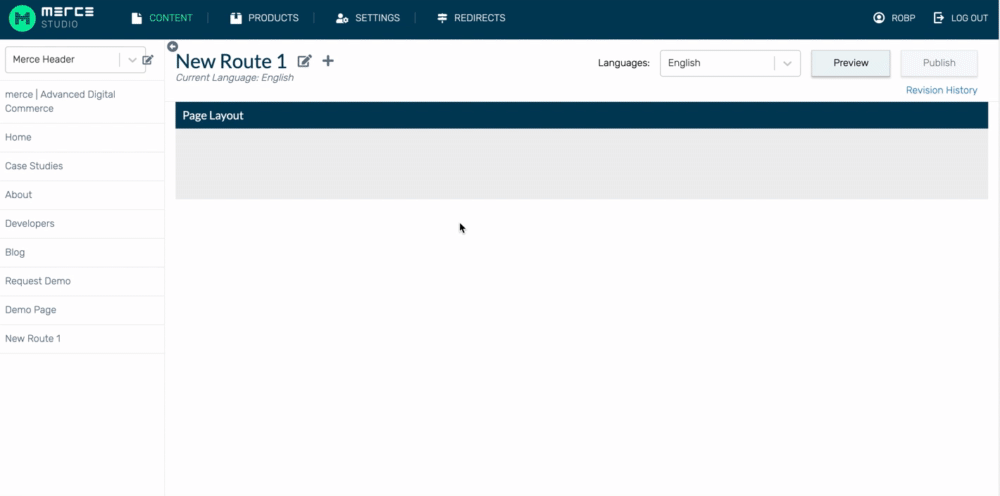
Navigating to Pages
Find all of your site pages by selecting Content on the Content dropdown. Select Pages from the dropdown menu.

Adding and editing site pages
In the Content tab, you can layout each page of your site and add content. To select a page to edit, simply click on the page name from the site map in the left toolbar.
The editor allows you to drag-and-drop elements onto a page to build out a digital experience quickly and easily.
Adding a new page
To add a new page:
Open the main navigation toolbar.

Select the edit icon to see your current site layout.
Add a new page with the ADD+ button and drag and drop to restructure the navigation.

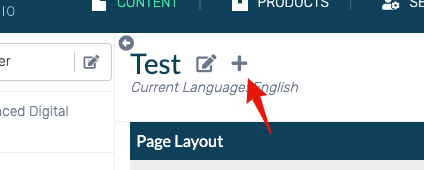
Editing pages
To edit the current page:
Select the edit icon at the top of the page.
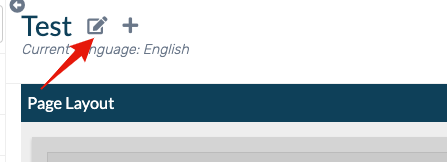
Change the basics of the page, the visibility, and the SEO keywords.
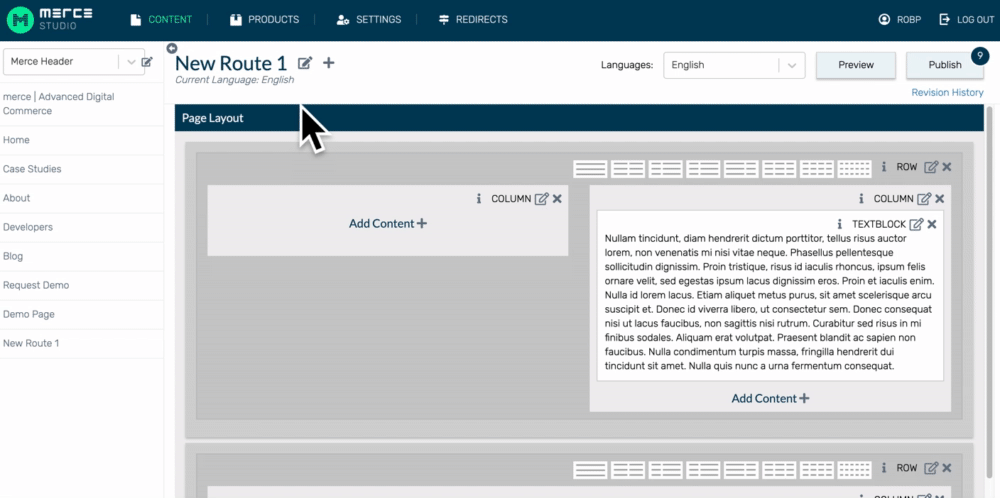
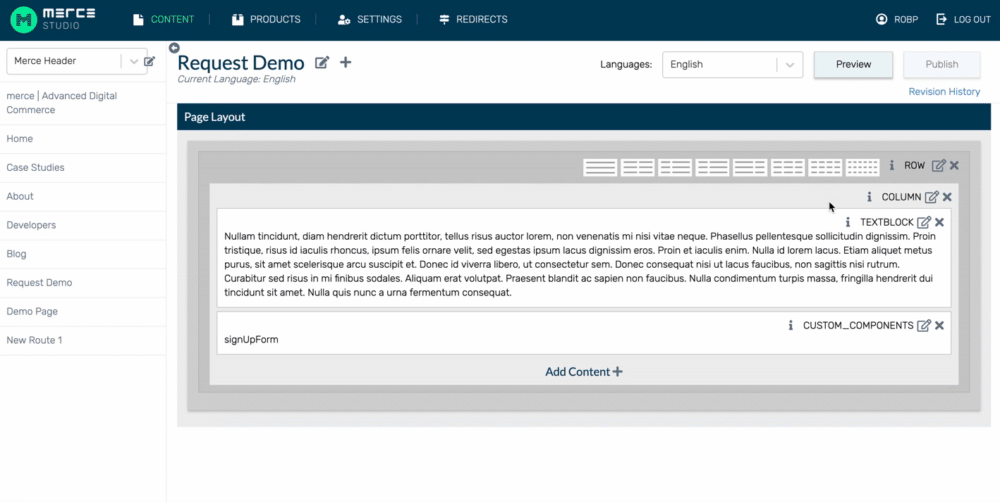
Adding new content
To add new content:
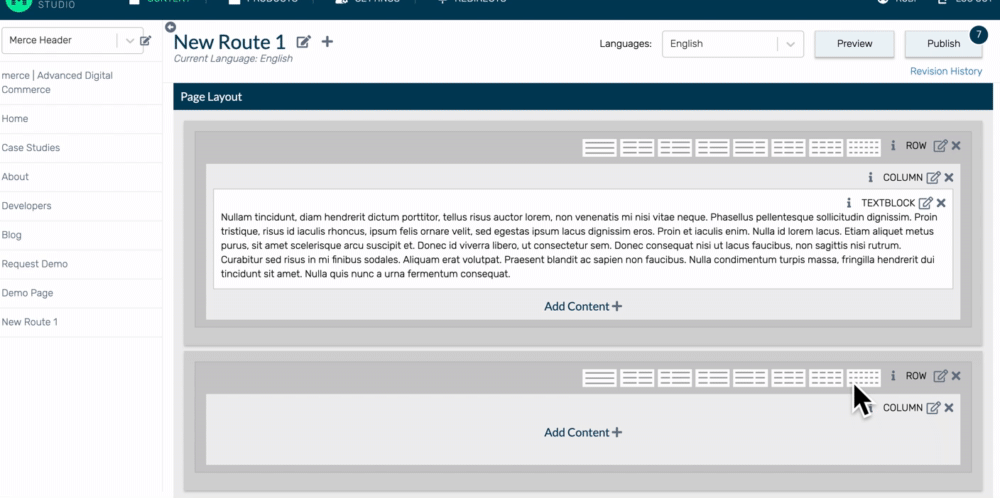
Select the Add Content+ button at the top of the container to insert content.
Insert the appropriate content type
Using text blocks
To insert a text block
click Add Content and then click on the Text Block content type.
To edit the text, click the Edit icon at the top right of the content box. From there you can insert your text.
Write and format your text.
Highlight your text and click on the B to make your text bold, or the I to make your text italicized.
Edit the text heading style, bullet or number items.
The text that you see in the box will appear in the same style on the page.
If you choose, text can also be inserted in HTML or CSS. Formatting elements can be added to display special types of text.
For more information on text to HTML see HTML Core Concepts.
To delete a content block, click the x at the top of the content box.
Inserting links into text blocks
To insert a link into a text box, highlight the text and click on the link icon.
To insert a link into the HTML text box,
Specify the target as:
<a href=" ">.
Add the URL text within the quotation marks.
Finally, add a to indicate where the link ends.
For more information on HTML see HTML Core Concepts.
Changing content languages
To add a new site language:
Select Add New Language from language dropdown in the top right corner of your page.
Choose from the list of available languages to translate the page for global users.
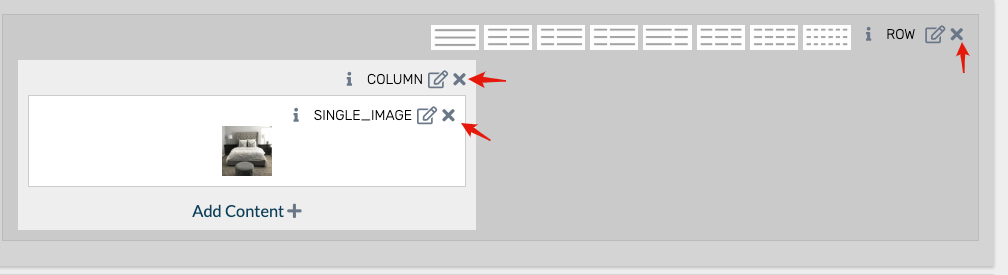
Adding images and other media
Using Images
To insert an image:
Click Add Content
Click on the Image content type. The box will automatically populate with your most recent image.
To change the image, click the Edit icon at the top right of the content box.
You can insert an image URL as well as the width, alt text, and body text.
Editing or deleting an image
To edit an image:
Click the Edit icon at the top right of the content box.
Enter options such as the width, alt text, and body text.
To delete an image, click the x at the top of the content box.
Setting a banner image
To insert a banner image:
Click Add Content>Banner. The most the recently linked banner will be added.
Change the image, or adjust the image style, click on the edit icon to bring up options.
Insert an image row or slide show
To insert an image row or slide show image:
Click Add Content>Slide Show or Add Content>Image Row.
The most recently linked images will be added. Click on the edit icon to bring up options.
To change the images, or adjust the image style, click on the edit icon to bring up options. Click the bottom arrows to change options for each image.
Inserting video, audio or other file type
To insert a video:
Click Add Content> Video. The most recently the linked banner will be added.
To change the video, click on the edit icon to bring up options. You must link to the video from Youtube or other video hosting source.
Adding social media elements
Select Add Content>Social.
Select the Edit icon at the top right of the box to insert your Curalate site.
Link your Curalate social platform where you can add Shoppable Content, User-Generated Content or influencer marketing.
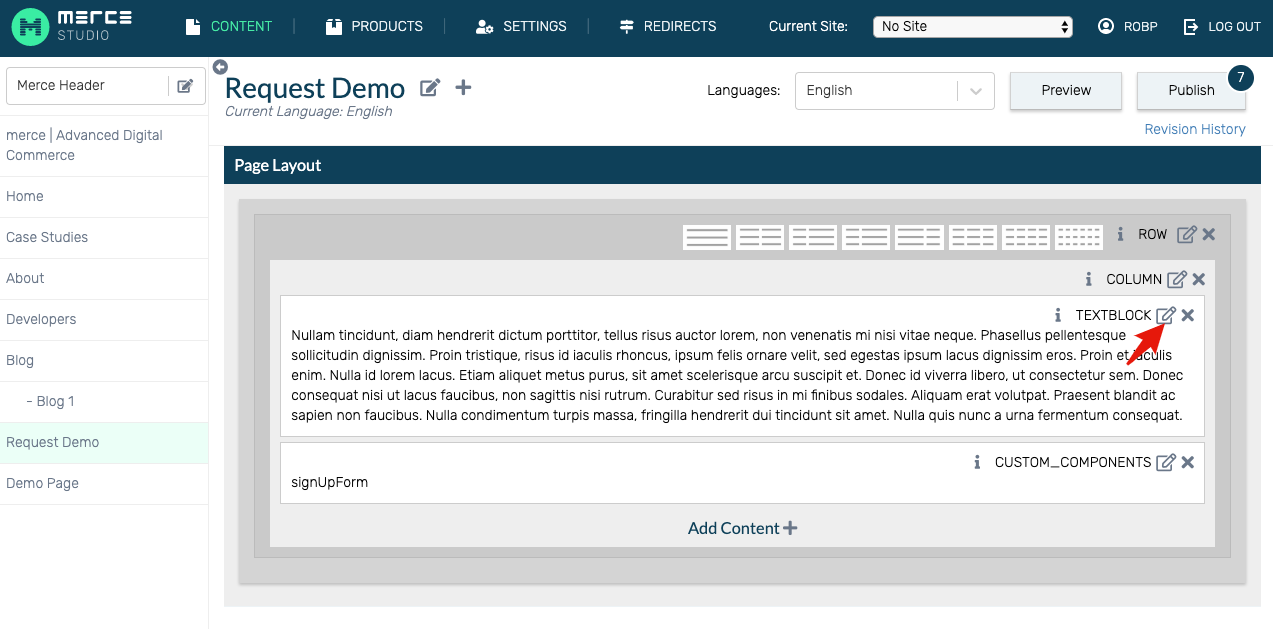
Form custom component
A business user can add a form to any page using the Custom_Components content block.
This content block will render two fields that need to be filled out for referenceID and parameters.
Within the referenceID field, enter “contactForm”
Clicking Save & Publish will display the contact form on the front end with the following fields: First Name, Last Name, Email, Phone Number, Your Message, & Attach Image.
This will also include a Submit Button: The form will send information to a custom email address.
Check out this video on how to add a contact form. <https://drive.google.com/open?id=1-5jKTNMLsqbSShShZcxwJW3uYnnRW7I_>
Laying out content
Once you’ve added your content, you can move it up or down on the site by dragging and dropping it.
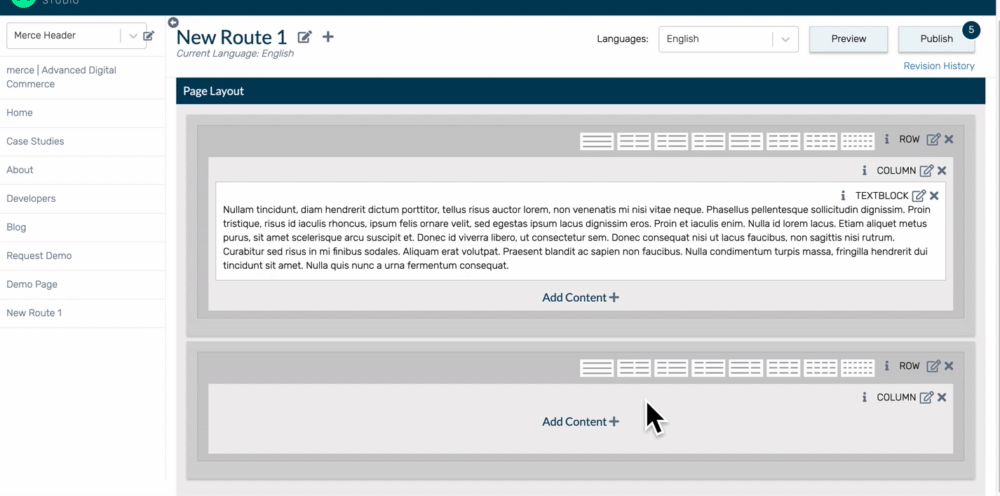
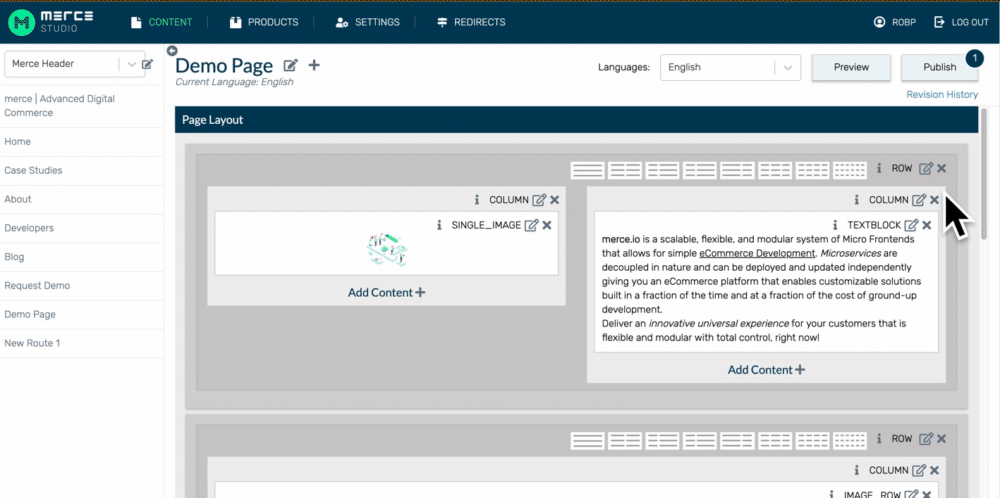
To separate your content into columns, select one of the icons indicating several columns and placements.

To move content within a row, use the reparent feature:
Click Add Content in the box you wish to place your content.
Select Reparent
Click on the content you wish to move.
Note: Merce has a standard 15-pixel margin. To customize your margins to extend to the edges of your browser, set your Margins to -15 to offset the automatic margins. Make sure both margins (left and right) are set the same to ensure symmetry.
Editing existing content
To edit your content:
Click on the Edit icon at the top right corner of the content type.
There you can edit your content. To publish the changes to the site, click Publish.
Previewing and publishing
To preview your revisions, click on the Preview button. This will show the changes on the site on mobile, tablet and desktop
Saving and publishing content
Content will be automatically saved as you edit. Once you are done editing:
Click Preview to view your changes.
Click Publish to publish the page on the live site.
Deleting content
To delete your content:
Click on the x at the top of the content type box.
To delete a container, row, or column click the x at the top of the appropriate box.
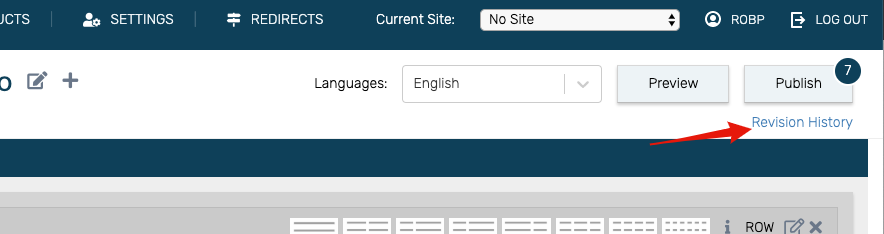
Viewing revision history
To see your revision history:
Click Revision History below the publish button.
View all previous revisions as well as the user who made the changes.
To preview the revision, click Preview.